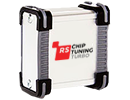
It is neither complicated nor long to install RS-Chiptuning to your vehicle. We have described the procedure very clearly in the installation manual, and you can watch video, that shows every small detail, on our web site.

Switch the engine off

Position the RS-Chiptuning, using our installation manual.

Drive more effectively with up to extra 30% of performance.
RS-Chiptuning positioning

- RS-Chiptuning device
- Detailed manual for positioning
- Zip ties
- Set of scotch-locks
RS-Chiptuning Turbo positioning

- RS-Chiptuning device
- Detailed manual for positioning
- Zip ties
- Set of wires
How to connect your RSchip properly
Manufactures use different types of ECU, so procedure of installation varies depending of car model. The interactive scheme of this page will help to plug in the wires into the right places.
Find the diagnostic jack (OBD 2) in the vehicle (as a rule it is located near the legs of the driver).
Click on places, which have pins inside (and therefore can be connected).
Click the button “Show positions of RSchip wires” and you will see, how to connect our device in the right way.

